Battery Problems
A frustrating experience for any vaper is dealing with battery problems. From inconsistent performance to complete failure, a faulty battery can significantly impact your vaping enjoyment. Fortunately, many common battery issues in Craftsman vape devices can be addressed with simple DIY fixes.
Replacing the Battery
One of the most frequent issues vapers encounter is an inability to charge their batteries properly. This could manifest as slow charging, failure to charge at all, or a battery that drains quickly. Often, this problem stems from a dirty or corroded charging port. Carefully clean the port using a soft brush and cotton swab dipped in isopropyl alcohol.
Another common issue is experiencing inconsistent power delivery, resulting in weak hits or fluctuations in vapor production. This can indicate a failing battery that needs replacement. If your battery seems to be on its last leg, it’s time to invest in a new one compatible with your Craftsman vape device.

Checking the Battery Connection
One potential cause of battery problems is a loose connection between the battery and the device. This can lead to intermittent power or complete failure. To check this connection, carefully remove the battery from the device (if possible). Inspect the battery terminals for any dirt, debris, or corrosion. Gently clean them with a cotton swab dipped in isopropyl alcohol.
Once clean, reinsert the battery and ensure it’s securely seated in its compartment. If the connection seems loose, try gently pressing down on the battery to make a better contact.
Calibrating the Battery
Calibrating your vape battery can sometimes resolve issues related to inconsistent power delivery or inaccurate battery life readings.
To calibrate your Craftsman vape battery, follow these steps:
1. Fully charge your battery.
2. Discharge the battery completely by vaping until it shuts off.
3. Charge the battery back to 100%.
After completing these steps, your Craftsman vape’s battery should be properly calibrated.
Coil Issues
Coil issues can significantly impact your vaping experience, leading to decreased vapor production, burnt flavors, and overall frustration. Understanding the common causes of coil problems and how to address them can help you extend the life of your coils and enjoy a smoother vape.
Identifying a Faulty Coil
Identifying a faulty coil often involves recognizing changes in your vaping experience. Decreased vapor production is a primary indicator, suggesting the coil is no longer heating efficiently. Additionally, a burnt or acrid flavor can signal that the coil is overheating and damaging, producing harmful byproducts. If you notice these issues, it’s likely time to replace the coil.
Sometimes, a dirty or clogged coil can contribute to poor performance. This buildup can obstruct airflow and prevent proper heating. If your vape tastes off or produces less vapor than usual, try cleaning the coil with a specialized cleaner or by carefully rinsing it with distilled water.
Replacing the Coil
Replacing a coil is generally a straightforward process. First, ensure your device is powered off and detached from any power source.
Locate the coil assembly, usually situated at the bottom or top of the vape tank. Gently unscrew or pry off the old coil, being careful not to touch the exposed heating element with your fingers.
Inspect the new coil for any seals or protective coverings and remove them as instructed. Carefully thread the new coil into the designated slot in the tank, ensuring it is properly aligned and secure. Screw or snap the coil assembly back into place.
Prime the new coil by dripping a few drops of e-liquid onto the cotton wicking material. Allow a few minutes for the liquid to saturate the wick before firing up your device.
Leakage Problems
Leakage problems can be a common and frustrating issue for vape users, often resulting in wasted e-liquid and messy experiences.
Cleaning the Tank
Leakage can stem from several factors, including a faulty tank seal, overfilling the tank, or using a coil with incorrect specifications.
To address leakage issues, first, make sure the tank is properly screwed onto the device and that the o-rings are clean and undamaged. Overfilling the tank can also lead to leakage, so ensure you fill it only to the indicated maximum line.
Inspect the coil for any debris or damage. If the coil is worn out or damaged, replace it with a new one compatible with your device.
Cleaning the tank regularly is crucial in preventing leakage. Disconnect the tank from the device and thoroughly rinse it with warm water and mild soap. Pay attention to the air holes and ensure they are clear of any obstructions.
Once cleaned, allow the tank to dry completely before reassembling it.
Inspecting the O-Rings
One potential source of leakage is worn or damaged O-rings. These small rubber rings create a seal between different parts of your vape device. Over time, O-rings can degrade due to exposure to e-liquid and heat, leading to gaps that allow liquid to escape.
To inspect the O-rings, carefully disassemble the relevant part of your vape tank or device (referring to the manufacturer’s instructions if needed). Look for cracks, tears, or signs of hardening. If you find any damaged O-rings, replace them with new ones of the correct size and material.
Adjusting the Airflow
Adjusting airflow in a Craftsman vape can be crucial for optimizing your vaping experience. The airflow controls how much air is mixed with the vapor produced by heating the e-liquid, affecting both flavor and cloud production.
To adjust airflow, locate the airflow control ring or slider on your vape tank. This is typically located near the top or bottom of the tank. Turning the ring or sliding the adjustment mechanism will open or close the air inlets.
Experiment with different airflow settings to find what works best for you. More open airflow generally produces larger vapor clouds but might sacrifice flavor intensity. Less airflow can lead to tighter draws and more concentrated flavors, but smaller clouds.
Heating Element Malfunctions
Heating element malfunctions can significantly impact your vaping experience. Common problems include coils that produce weak hits, burnt flavors, or fail entirely.
Testing the Heating Element
Testing the heating element is essential for diagnosing these issues. Here’s a step-by-step guide:
- Safety First: Disconnect your vape device from any power source and allow it to cool completely before handling the heating element.
- Coil Removal: Carefully remove the coil assembly from the tank, following the manufacturer’s instructions. Be gentle to avoid damaging the delicate heating element.
- Visual Inspection: Examine the coil for any signs of damage, such as cracks, burns, or fraying on the heating element.
- Resistance Testing (Advanced): If you have a multimeter, you can check the resistance of the heating element. The specific resistance value will vary depending on the coil type, but it should fall within a certain range specified by the manufacturer.
Cleaning the Heating Element
A faulty heating element is often indicated by decreased vapor production, burnt tastes, or complete failure to heat. Cleaning the heating element can sometimes resolve these issues, especially if residue buildup is obstructing airflow or preventing proper heating.
To clean your heating element, start by detaching the coil assembly from your vape tank (always refer to your device’s manual for specific instructions). Gently remove any visible debris or residue with a cotton swab dipped in isopropyl alcohol.
If there’s stubborn buildup, a specialized coil cleaner can be effective. Follow the product’s instructions carefully and ensure you rinse the element thoroughly afterward to remove any residual cleaner.
Let the heating element air dry completely before reassembling your vape tank. Remember, excessive force or abrasive cleaners could damage the delicate coils, so handle them with care.
Firing Button Issues
Firing button issues can be frustrating for any vaper. A malfunctioning firing button can prevent you from activating your device, leading to a disappointing vaping experience.
Cleaning the Firing Button
A common issue is a sticky or unresponsive firing button. This can occur due to dust, debris, or e-liquid buildup around the button mechanism.
To clean a sticky firing button, carefully remove any visible dirt or residue with a cotton swab dipped in isopropyl alcohol. Gently work the button back and forth while cleaning to loosen any stuck particles.
If the problem persists, you may need to disassemble the firing mechanism slightly (refer to your device’s manual for instructions) and clean it more thoroughly.
A faulty wiring connection inside the device can also cause firing button issues. This is a more complex issue that may require professional repair.
Replacing the Firing Button Switch
Firing button issues can be frustrating for any vaper. A malfunctioning firing button can prevent you from activating your device, leading to a disappointing vaping experience.
A common issue is a sticky or unresponsive firing button. This can occur due to dust, debris, or e-liquid buildup around the button mechanism.
To clean a sticky firing button, carefully remove any visible dirt or residue with a cotton swab dipped in isopropyl alcohol. Gently work the button back and forth while cleaning to loosen any stuck particles.
If the problem persists, you may need to disassemble the firing mechanism slightly (refer to your device’s manual for instructions) and clean it more thoroughly.
A faulty wiring connection inside the device can also cause firing button issues. This is a more complex issue that may require professional repair.
Replacing the firing button switch is a solution if cleaning doesn’t resolve the problem. This involves carefully disassembling the device to access the firing mechanism and replacing the faulty switch with a new one.
This process can be delicate and may require some technical know-how. If you are uncomfortable performing this repair yourself, it is best to seek assistance from a qualified technician.
Be sure to source a compatible firing button switch specifically designed for your Craftsman vape device.
Other Common Problems and Solutions
Beyond battery troubles, Craftsman vapes can encounter other common issues that DIY fixes can address. Coil problems, leaks, airflow restrictions, and even malfunctioning firing buttons can all disrupt your vaping experience.
Firmware Updates
One frequent issue is a decline in flavor or vapor production. This often points to a dirty or clogged coil. Try cleaning the coil with a specialized cleaner or distilled water, being careful not to damage the delicate wicking material.
Another common problem is leaking e-liquid. Check for a damaged tank seal, overfilling, or an incompatible coil. Ensure your tank is properly screwed on, avoid overfilling, and use coils designed for your specific device.
If airflow seems restricted, inspect the air inlets for blockages. Gently clean them with a soft brush or cotton swab.
Firmware updates can sometimes resolve performance issues and introduce new features. Check the manufacturer’s website or app for updated firmware versions compatible with your Craftsman vape model. Follow their instructions carefully when installing any firmware updates.
Resetting Factory Settings
If you’ve tried all the DIY solutions and your Craftsman vape is still giving you trouble, it might be time to consider a factory reset. This can sometimes resolve persistent software glitches or conflicts that other methods haven’t addressed.
The exact procedure for resetting a Craftsman vape will vary depending on the specific model. It’s essential to consult your device’s user manual or the manufacturer’s website for detailed instructions tailored to your vape.
Generally, factory resetting involves holding down certain buttons in a specific combination for a set duration. This will erase all custom settings and return the device to its original factory configuration.
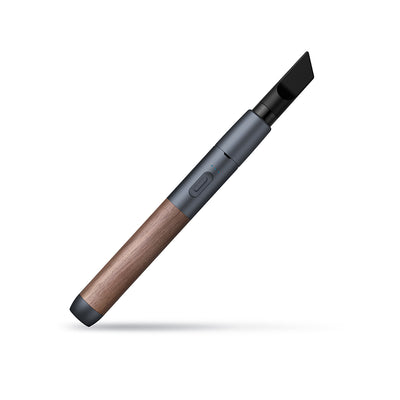
Buy high-end Vessel Craftsman Series vape pens today
- Jaw Fillers For A Defined Jawline Near Morden, Surrey - May 25, 2025
- Top DIY Fixes For Common Craftsman Series Vape Issues - May 25, 2025
- Barack Obama Quotes: Famous And Inspiring Sayings From The 44th US President - May 25, 2025